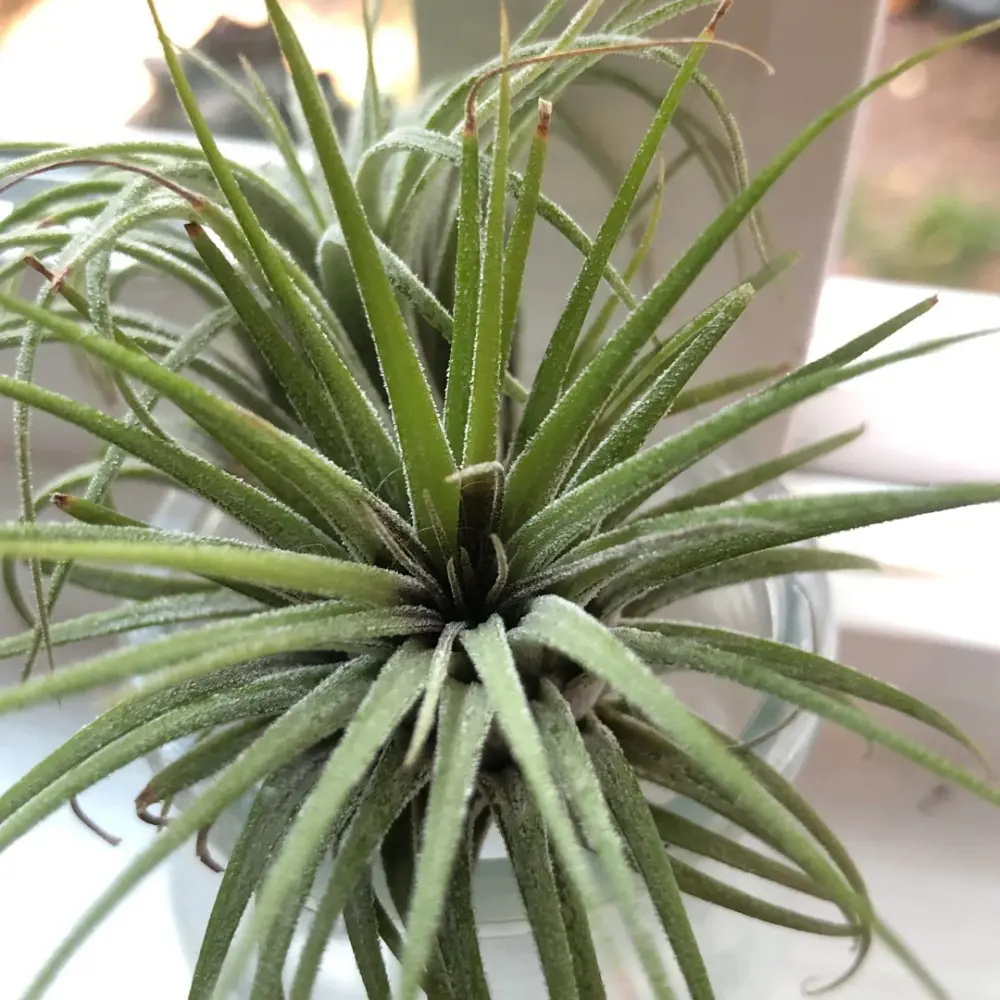
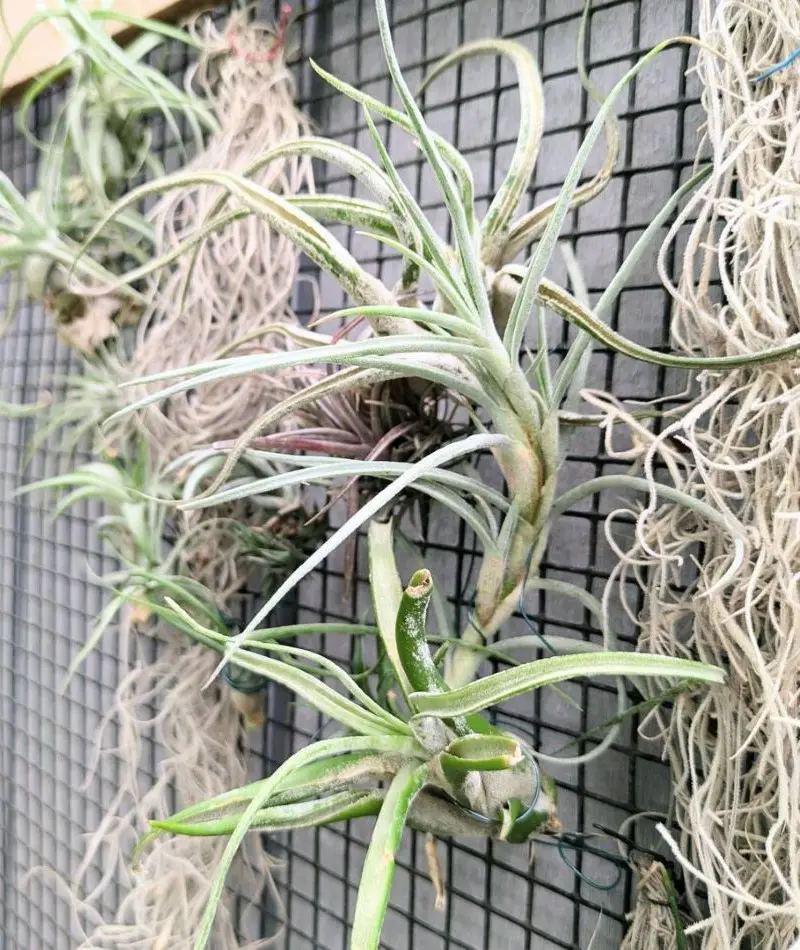
Air plants are unique houseplants that do not require soil to grow. However, this does not mean they do not need water. Instead of rooting in the soil, air plants use their short, wiry roots to attach themselves to other plants, rocks, or buildings.
They absorb the nutrients and moisture they need directly from the air through specialized cells on their leaves. This quality makes them incredibly low-maintenance. Below, we will provide you with tips and techniques on how to water air plants.
Misting air plants involves spraying a fine water mist onto the plant’s leaves using a spray bottle. This method mimics the natural environment of air plants, which often grow in humid, tropical regions where they absorb moisture from the air.
To mist your air plants, fill a spray bottle with water and lightly spritz the entire plant, including the underside of the leaves. This should be done every few days, depending on the humidity of your environment. Misting helps keep the plant hydrated without the risk of overwatering.
2. Soaking
Soaking air plants is an effective way to water them. Once a week, you submerge or soak air plants in a water bowl for about 20-30 minutes. This allows the plants to absorb the moisture they need.
After soaking, gently shake off excess water and place the plants upside down on a towel for an hour or so to dry. This step is important because air plants are prone to rot if water sits in their leaves too long. After they have dried, you can place them back in their display spot.
3. Rinsing
Another method of watering air plant is rinsing. Rinsing is where you hold the plant under running water for a few seconds. This method is quick and effective for hydrating the plant, especially if you are short on time.
The water should be at room temperature, as extreme temperatures can shock the plant. After rinsing, shake off excess water and place the plant upside down on a towel for 10-15 minutes to drain. This prevents water from collecting in the base, which can lead to rot. Rinsing is best done 2-3 times a week.
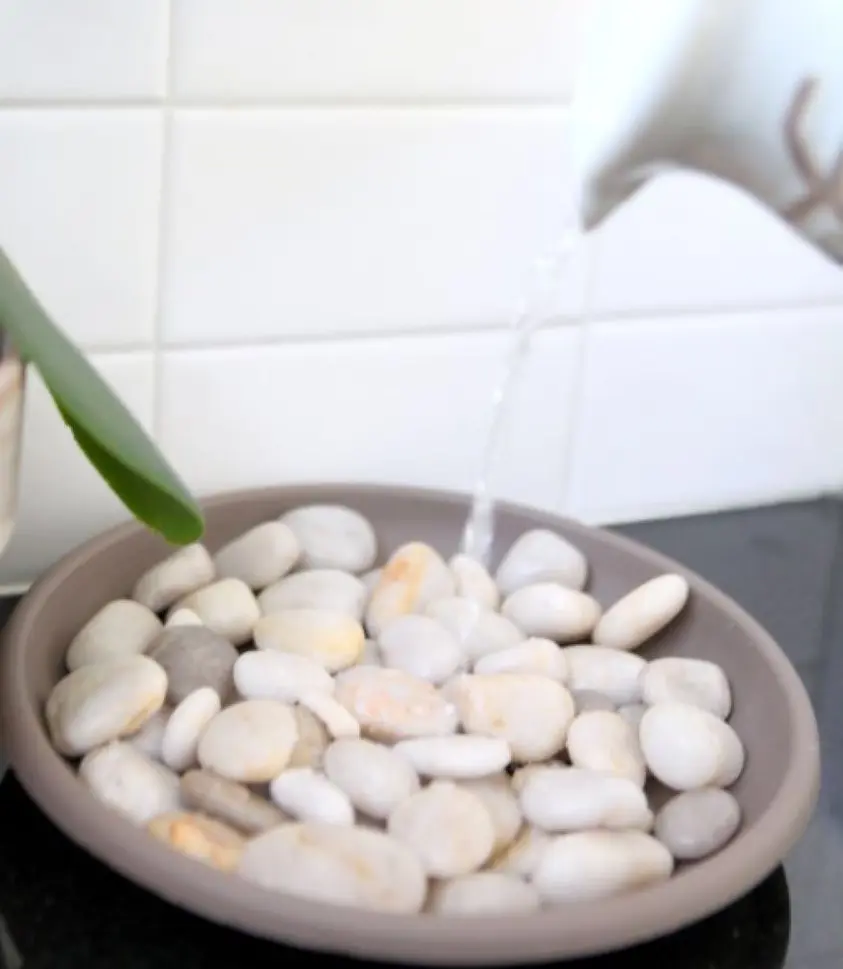
Humidity trays are a simple way to water for air plants. The trays keep air plants hydrated by increasing the moisture level around them. Place a shallow tray or dish filled with water and pebbles or small stones.
The pebbles help to elevate the plants above the water level, preventing the plants from sitting directly in water, which can lead to rot. As the water evaporates, it creates a humid micro-environment around the plants, which they can absorb through their leaves. This method is useful in dry indoor environments with low humidity.
5. Dew Collection
Collecting dew relies on natural water for air plants. It involves placing your air plants outside overnight in a shaded or sheltered area so that they can naturally absorb moisture from the dew that forms in the early morning.
Dew is a form of condensation that occurs when the air temperature drops and moisture condenses on surfaces like plants. This method mimics the natural environment of air plants, which often grow in humid, misty regions where they rely on dew and rain for moisture.
6. Rainwater
If you are wondering how to water Tillandsia without much effort, you can use rainwater. Rainwater is naturally soft and free from the chemicals found in tap water, like chlorine or fluoride. It also contains trace minerals and nutrients that benefit air plants and promote healthier growth.
Air plants are epiphytes that absorb moisture and nutrients through their leaves, making the water purity and nutrient content particularly important. Collecting rainwater and using it to soak or mist your air plants mimics their natural environment.
7. Shower Water
Using shower water to water air plants is a good way to save water. When you shower, the warm water makes the air more humid, which is similar to the environment air plants naturally enjoy.
To water your air plants using shower water, you can either place them in the shower with you and let the water lightly run over them or hold them under the showerhead for a few seconds. This method not only waters the plant but also helps to rinse off dust and debris that may have accumulated on the leaves.
If you have an aquarium, do not throw out the water the next time you clean it. Aquarium water provides additional nutrients that air plants benefit from because the water contains beneficial compounds from fish waste, which act as natural fertilizers.
When you clean your fish tank, collect some of the water. Submerge your air plants in the aquarium water for about 20-30 minutes. After soaking, rinse the plants briefly under clean water and shake off the excess water. Let the plants dry before placing them back.
9. Filtered Water
Filtered water for your air plants is a great way to ensure they receive clean, chemical-free hydration. Many tap waters contain chlorine, fluoride, or other chemicals that can build up on your air plants over time, potentially harming them.
By using filtered water, you remove these chemicals, providing a purer source of moisture. Filtered water can be obtained from various sources, such as a water filter pitcher, a faucet-mounted filter, or a whole-house filtration system. Ensure the filtered water is at room temperature to avoid shocking the plants with cold water.
10. Distilled Water
If you want to use water that is even more pure than filtered water, try distilled water. Distilled water is virtually free of minerals, chemicals, and contaminants that can sometimes remain in filtered water. This type of water benefits air plants, as mineral buildup from hard tap water can harm them over time.
By using distilled water, you avoid potential issues like leaf browning or rot caused by excess salts and chemicals. You can soak your air plants in distilled water for 20-30 minutes once a week.
11. Soaking in Fertilizer
Soaking your air plants in a diluted fertilizer solution occasionally helps water the plant and provide essential nutrients directly to its leaves. To do this, mix a liquid air plant fertilizer with water according to the instructions on the package.
Submerge the plant in this mixture for 20-30 minutes. After soaking, rinse the plant thoroughly with plain water to remove excess fertilizer. Let it dry completely before returning it to its usual spot. You can do this once a month or less, depending on the plant’s growth and needs.
Placing air plants in a bathroom can be a way to keep them hydrated because bathrooms often have higher humidity levels. The steam from showers and baths helps to keep the air around the plants moist. This increased humidity can benefit air plants, which absorb moisture through their leaves.
To maximize this benefit, place the air plants in an area where they will get indirect light and not be exposed to excessive water or steam directly. The natural humidity of the bathroom helps to maintain their health without frequent manual watering.
13. Waterfall or Fountain Mist
Placing air plants near a waterfall or fountain can provide consistent moisture. The constant mist and high humidity generated by these water features are similar to the plant's natural environment. Air plants naturally grow in regions with high humidity and occasional rainfall, so the mist from a waterfall or fountain creates an ideal microclimate.
Position your air plants within the splash zone or close to the mist, but not directly under the water flow. This ensures they receive a gentle, regular mist without being overly saturated, which can lead to rot.
14. Indoor Humidifiers
Indoor humidifiers can help maintain moisture levels for air plants, especially in dry environments. Place your air plants in the same room as a humidifier. Ensure the plants are not directly under the humidifier to avoid excessive moisture that can lead to rot.
Aim for a humidity level of around 40-60%. This range benefits the air plants and helps them absorb moisture more effectively. Also, monitor the plants and adjust the humidifier settings as needed so that they do not sit in a constantly damp environment, which can cause fungal issues.
15. Greenhouse Environment
A greenhouse environment can provide an ideal habitat for air plants due to its controlled climate. You can maintain higher humidity levels and a consistent temperature, which air plants require. To utilize a greenhouse for air plants, the humidity level should be ideal to reduce the need for frequent watering.
Also, ensure the temperature is stable, as extreme conditions might stress the plants. Lastly, ensure that the greenhouse provides filtered light, as direct sunlight might be too intense, and has good air circulation to help the plants absorb moisture and prevent rot.
Diluted seawater is similar to the natural coastal waters where some Tillandsia species grow. Hence, it can be used to water air plants, as seawater contains a variety of minerals and trace elements beneficial for plant health.
For this method, dilute seawater with fresh water with 1 part seawater to 10 parts fresh water to avoid over-salting. Then, mist or soak the air plants in this solution to provide them with essential nutrients while imitating their natural habitat. After that, rinse the plant with fresh water thoroughly to remove any excess salt.
17. Terrarium Environment
Creating a terrarium environment for air plants involves setting them up in a sealed or semi-sealed glass container, which helps maintain high humidity levels. In a terrarium, the air plants can benefit from the moisture that accumulates inside the container if you include other elements like moss or small pebbles.
To enhance this setup, lightly mist the plants occasionally and ensure the terrarium has good air circulation to prevent mold. The enclosed space helps mimic a tropical environment, keeping the plants hydrated and healthy. This method is useful in dry climates.
18. Fogger
Using an indoor fogger for air plants involves creating a fine mist of water that helps to mimic their natural, humid environment. A fogger generates a cool mist by ultrasonic vibration, which disperses tiny water droplets into the air.
Placing your air plants near or under the fogger allows them to absorb moisture from the mist, providing consistent hydration. This method is particularly effective during winter when indoor air tends to be less humid. Regular use of a fogger can help maintain the ideal moisture level for your air plants.
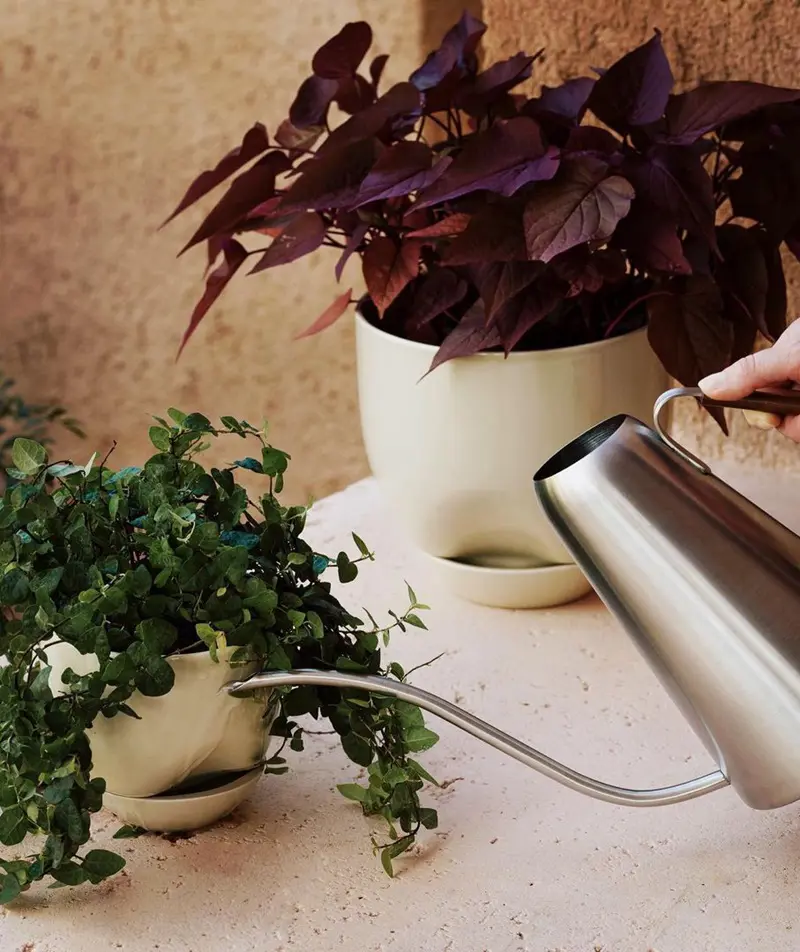
19. Watering Can
You can also use a watering can to water your air plants as long as you are careful with the amount of water you use. Fill a watering can with water, and use one with a fine spout to control the flow. Gently pour water over the air plant, allowing the water to distribute evenly and reach all parts of the plant. \
Be cautious not to overwater; you want to moisten the plant without soaking it. After watering, let the plant dry to prevent water from collecting at the base, which can cause rot.
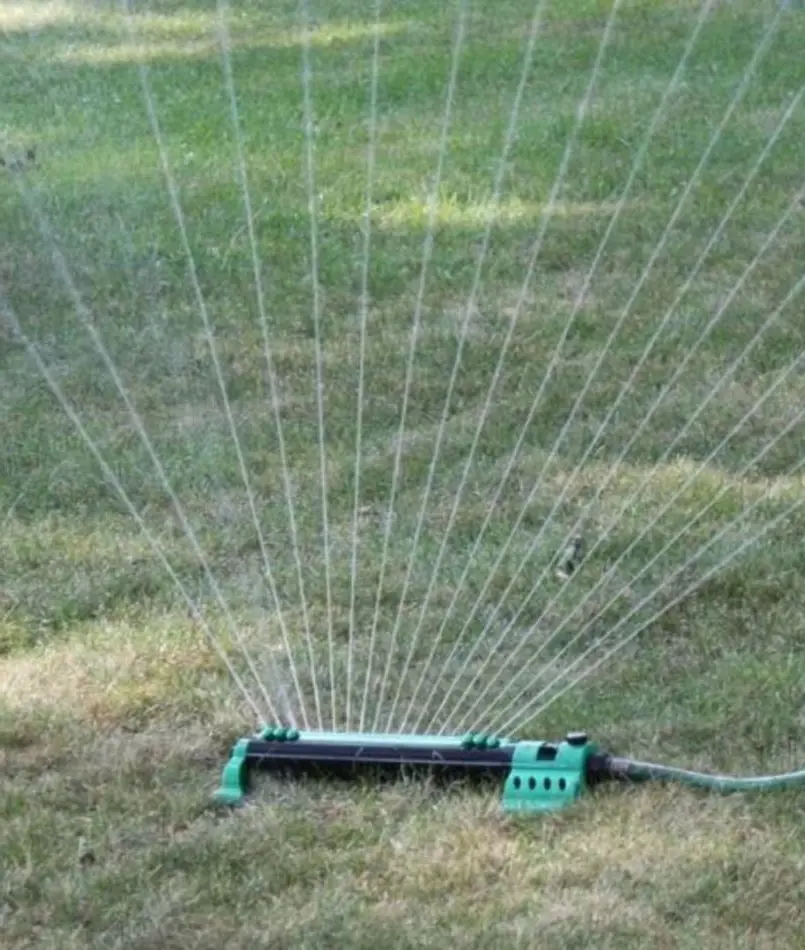
Placing air plants outside in the path of sprinklers is a practical way to water them, especially if you have a garden or yard with an irrigation system. When the sprinkler system activates, it delivers a fine spray of water that can gently coat the air plants, providing them with moisture.
This method allows the plants to absorb water through their leaves. It is an easy way to ensure they get hydrated without misting or soaking them manually. Just make sure they are dry thoroughly to prevent rot.
How Often Do You Water Air Plants?
If you are wondering how often to water air plants, note that they need to be watered once a week. However, the frequency can vary based on environmental conditions like humidity and temperature.
In a dry, hot climate, you might need to water them more often, while in a humid environment, they may need less frequent watering. Adjust based on how quickly the plants dry out after watering—if they feel dry or look wilted, it is time for another soak or mist. Always ensure they have adequate airflow and dry completely after watering to prevent rot.
Benefits of Air Plants
Air plants are popular for both indoor and outdoor spaces. If you are considering growing air plants in your home, there are several benefits
Low Maintenance
Air plants are low maintenance, making them an ideal choice for busy people or those new to gardening. They do not need soil to thrive and absorb water and nutrients through their leaves from misting or soaking.
This makes them easy to care for, as you do not have to worry about soil quality or regular repotting. Their watering needs are minimal compared to soil-based plants, requiring a soak or misting once a week. Additionally, they can adapt to various lighting conditions.
Air Purification
Air plants can help improve air quality by absorbing pollutants and releasing oxygen through photosynthesis. As they take in carbon dioxide and release oxygen, they contribute to a fresher and cleaner environment.
Additionally, air plants absorb airborne toxins, such as volatile organic compounds (VOCs), emitted by various household products and materials. This natural air purification process helps create a healthier living space, making air plants a beneficial addition to homes and offices where air quality might be a concern.
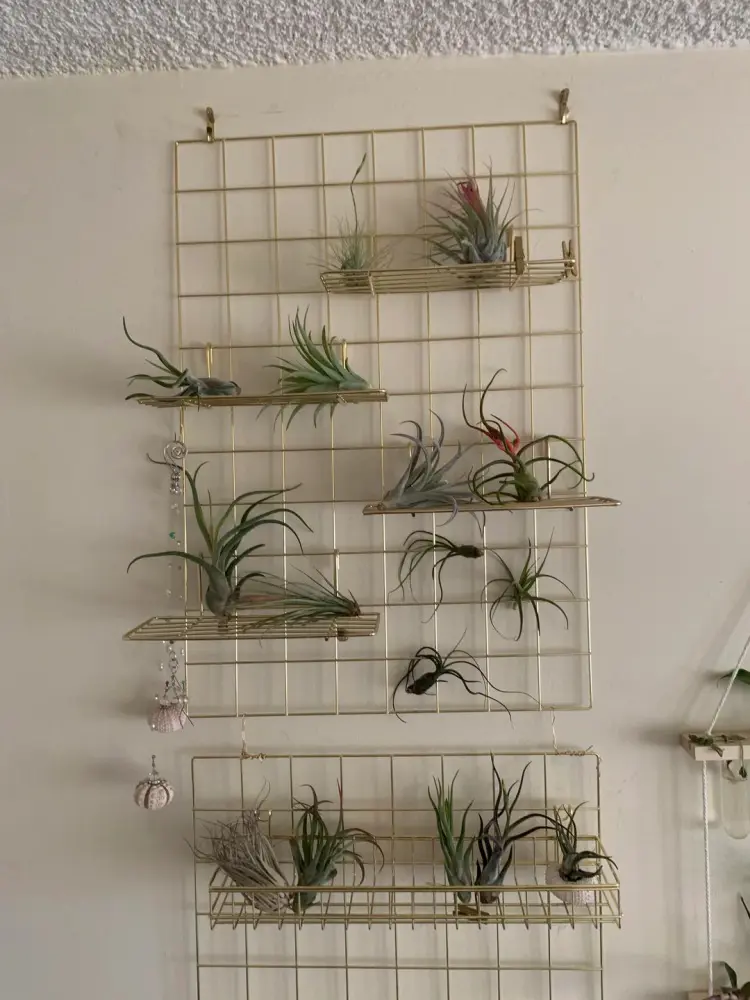
Air plants are incredibly versatile in their display options, which makes them a favorite for creative decorating. Since they do not need soil, they can be placed in various containers and arrangements. You can mount them on driftwood, hang them from a wire or glass globe, or set them in decorative terrariums.
They can also be arranged in artistic displays on shelves, glass jars, or old teacups. Their adaptability can complement various interior styles, from modern minimalism to rustic charm. This flexibility in presentation helps add a unique touch to any space.
Compact Size
Air plants' compact size is one of their main advantages, especially for those with limited space. Unlike traditional plants that require larger pots or garden beds, air plants can be placed almost anywhere. They fit well on small shelves, desks or even mounted on walls or hanging displays.
Their minimal space requirements make them ideal for apartments, offices, or any area where space is at a premium. This adaptability allows you to enjoy greenery and nature without needing a lot of room, making them a flexible choice for various settings.
Unique Appearance
Air plants add a sculptural quality to decor with their unique and varied shapes. Unlike traditional plants that grow in soil and often have more uniform appearances, air plants come in various forms—from spiky and tubular to curly and rosette-like. This variety allows them to serve as eye-catching focal points in any space.
Their unusual growth patterns and textures can contrast beautifully with other elements in your decor, making them stand out as living art pieces. This distinctive look makes air plants a popular choice for modern and minimalist interiors, as well as for creative displays.
Humidity Increase
Air plants can help increase humidity in your home, which is especially beneficial in dry environments. As they absorb water through their leaves, they release moisture into the air through transpiration. This gradual release of moisture can help to counteract the effects of dry indoor air, making the environment more comfortable for both people and other plants.
By adding a few air plants to your space, you can naturally boost the humidity levels, which can improve overall air quality and help maintain a balanced indoor climate.
Easy to Propagate
Air plants, or Tillandsia, produce offsets, commonly known as "pups," which are smaller, new plants that grow from the base of the parent plant. To propagate them, wait until the pups are about one-third the size of the parent plant and have developed their roots. Gently separate the pup from the parent by twisting or cutting it off.
You can then place the pup in a new location as the parent plant. Over time, the pup will grow into a mature plant. This easy propagation method allows you to expand your collection or share plants with friends.